Best thing in life: studded sneaks.
Showing posts with label diy. Show all posts
Wednesday, June 13, 2012
Wednesday, May 16, 2012
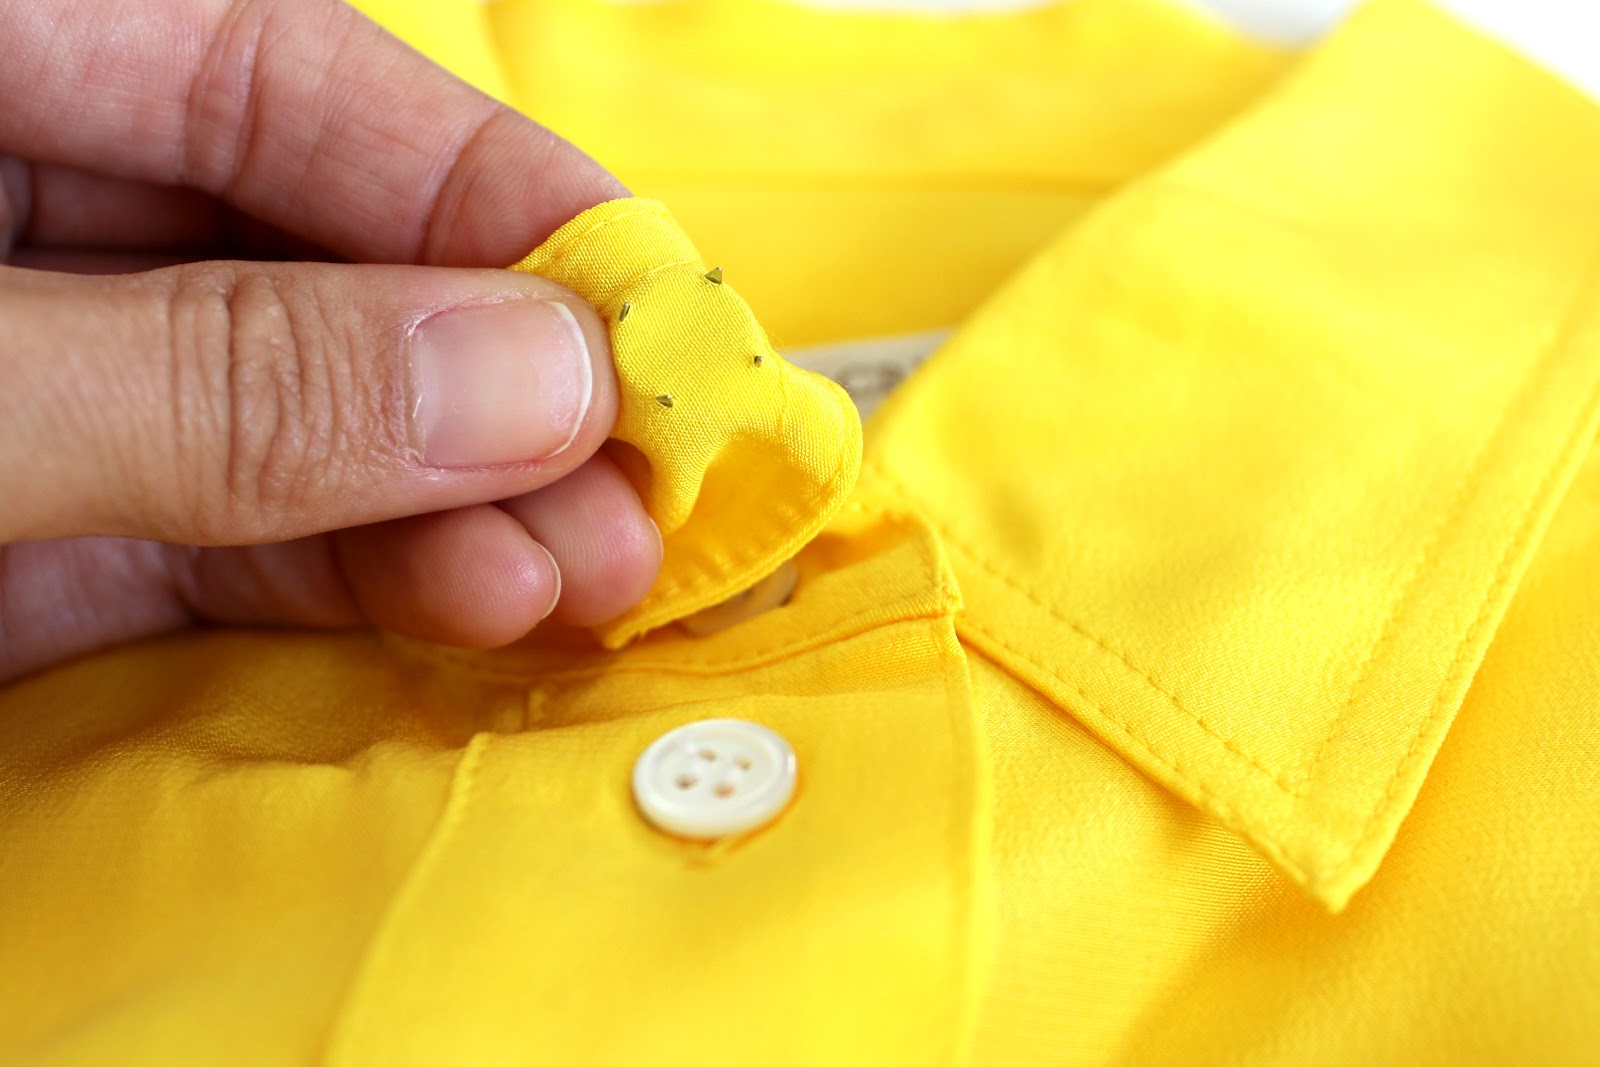
DIY'ing!...Studding Jcrew Yellow Blouse
I'm starting to realize that nothing in my closet is safe from being studded. I've had this yellow blouse for a while- and it became my next victim!
How to:
1. Get your supplies together; all you'll need are the studs and pliers
2. Sometimes I lay out the studs in the design I want, so I'm not studding blindly (not pictured)
3. Poke stud all the way through the fabric
4. Use pliers to push down each prong of the stud, make sure it's securely pushed down so it doesn't slip out
5. Repeat until you've completed your design!
...Also...I studded the denim jacket below a couple months ago...
... buuut I wasn't totally satisfied with the end result (maybe because I ran out of studs, ha). I think it's just going to be a work in progress. I'll just keep adding random studs/spikes until it's super crazy and hopefully it turns out something like my inspiration below...
...quite a task- but I'm up for the challenge!!
Would love any suggestions that you guys might have too :)
Labels:
denim jacket
,
diy
,
Everything Studs
,
silk blouse
,
studded denim jacket
,
studs
Thursday, April 26, 2012
DIY'ing!!...Studding the Zara Thin Strap Sandals
LOVE these sandals from Zara, but wanted to make them a little more "me."
What you'll need:
-Fabric poker
-Screwdriver
-Spikes (I got the screw on kind this time)
HOW:
1. Use the fabric poker to make a hole through the leather
2. Stick the screw through from underneath, and screw on the spike from the top
3. Secure the screw with the screwdriver
4. Repeat! And of course it's up to you how many spikes you want!
Labels:
diy
,
Everything Studs
,
screw on spikes
,
studs
,
thin strap sandals
,
zara
Friday, April 20, 2012
DIYING!...Studding the JCrew Patent Flats
Honestly, this probably isn't the most professional way to DIY...but I usually just wing it and use what I got in my hizzle! (it's cheaper)....
It was pretty easy...I got the studs I wanted, the flats I wanted to stud...and made shit happen!
What you'll need:
1. X-acto Knife
2. Studs
3. Pliers
How:
1. Figure out the pattern/design for the studs (obviously)
2. Make an imprint of the stud prongs on the patent leather
3. Use the X-acto knife to make small slits through the leather, in the place of the imprint
4. Stick the prongs through the slits
5. Use pliers to fold down the prongs on the inside of the shoe
Annnnd done!
Labels:
diy
,
Everything Studs
,
jcrew
,
patent flats
,
pointy flats
,
studding
,
studs
Tuesday, March 27, 2012
DIY'ing!...Studding the Long Draped ZARA Dress
When I saw the Long Draped Dress from Zara, I instantly fell in love with it. But of course when I brought it home, I thought...this would look so much cooler with studs! So I went on an adventure downtown where I get all my studs, got all my supplies- and started DIY'ing!
Supplies you need:
-The Studs (obviously)
which in LA, I go downtown to get...you can get them at trim stores, or even online (I would suggest getting the screw on ones though- this was my first time using this kind and it was a lot more difficult to have to hammer them in)
-Hammer
-Block of wood (to make hole for the stud tip)
-Fabric poker (not sure what they are actually called haha), or a sharp object
1. I usually wing it when I stud things, but you can measure the distances between each stud if you'd like, and mark them.
2. Poke a hole with fabric poker, stick the back end of the stud through, and connect it with the front of the stud.
3. Place the pointy part of the stud in the hole in the wood, and hammer the back down til' it is secure!
4. Repeat, and add as many studs as you'd like!
Labels:
a studding
,
anything with studs
,
diy
,
Everything Studs
,
maxi dress
,
zara
Subscribe to:
Posts
(
Atom
)